Recently I realized that, while most young adults are tech savvy, it doesn’t necessarily mean that everyone knows the best way to do tech things. Specifically in regards to writing and sending a missionary newsletter. After all, we are always reminded of the importance of keeping in touch with our prayer supporters, but what’s the actual best way to do that? Well, obviously an emailed missionary newsletter, but which one? and how?
That’s what we’re about to address, but first let’s look at what not to do.
A few weeks back, I realized the question of missionary newsletter best practices might need to be addressed, after receiving a newsletter from a friend. This newsletter had several big “no’s” demonstrated within in.
This particular newsletter was sent out as a plain email. Not a big deal, but sending mass mailings through your standard email account can get you flagged as a spammer. So, that is a risk that you may not want to take.
Being in a plain email, there was no way to unsubscribe. This is actually a violation of the Canadian email newsletter “CAN spam” act and could result in a fine, or worse.
The “to” field was fully populated with 50+ emails. This means that whoever got the email now also had the emails of everyone else in the church. While I suspect that the emails were taken from the church directory, as I didn’t opt in anywhere, one could have easily used the blind carbon copy (BCC) option for email privacy.
Missionary Newsletter Best Practices
Use an email newsletter program to facilitate your newsletter. Most programs will help you with the design, personalization, and ease of sending of your newsletters. Newsletter services like MailChimp are free for small lists, easy to use, and have many of the legal requirements automatically built into the newsletter form.
Using a program takes the guesswork out of adding an unsubscribe option. It hides that it is a mass emailing, and the recipient only sees their own email in the “to” field. You can even add pictures, videos, and other graphic elements to make your newsletter stand out. I frequently get comments from my supporters loving the newsletter pictures. So, variation is always more fun that a wall of text.
Further, an email newsletter program will also keep your email account from getting flagged due to mass emailings. No one wants to get locked out of their email account, in the middle of a mission’s trip, because they spammed the entire church.
Use A Sign Up – either a paper form, or a web form for people to fill out to “opt in” to your missionary newsletter. While all newsletter services will permit you to manually enter subscribers, you do have to confirm that the person wants to be added. On Mailchimp, this is a simple check box. This fulfills the legal anti-spam requirement. Just like having an unsubscribe option fulfills the legal requirement.
Creating Your Missionary Newsletter List:
Start by creating an account on an email newsletter program. I prefer MailChimp but you can find another program if you prefer.
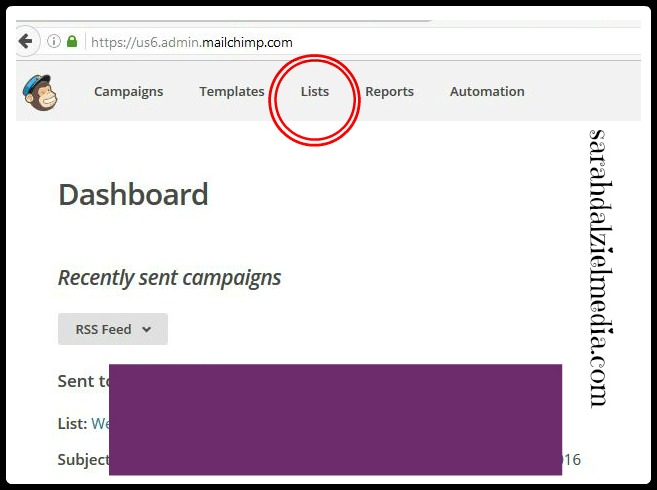
Create a list in MailChimp and input your own email for testing purposes. To do that, on your dashboard page click the “List” button.
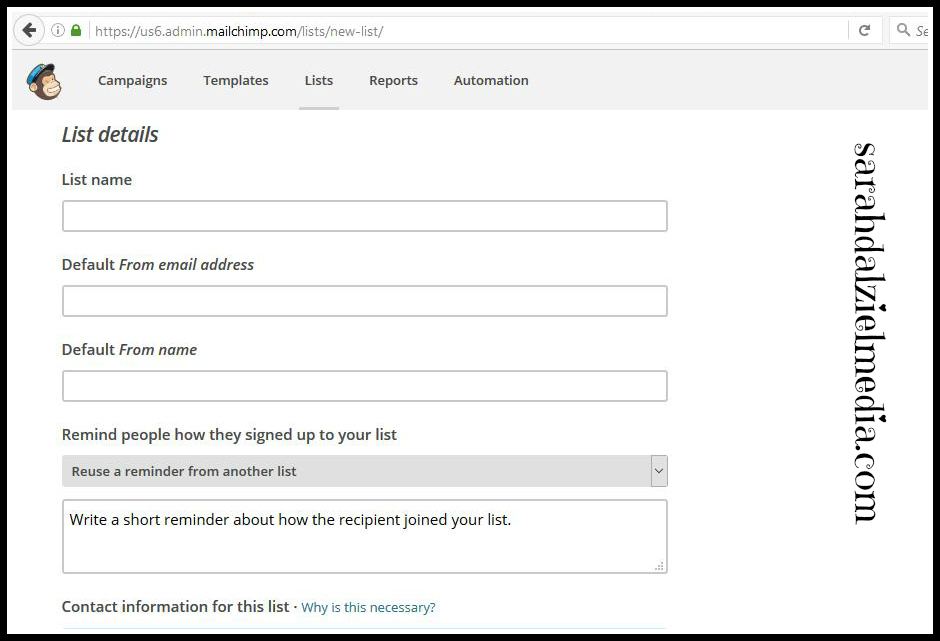
Select the grey “create list” button on the upper right side of your screen. Then, select “create list” in the grey drop down field that appears.
Title the list “your name Newsletter,””your name Missionary Newsletter,” or whatever you want to call it. Fill out the “from email” and other pieces of information on that page.
To add your first subscriber, select the list after creation and click on the +people button. Or, open the list and select “add subscriber” from the menu across the top of the page.
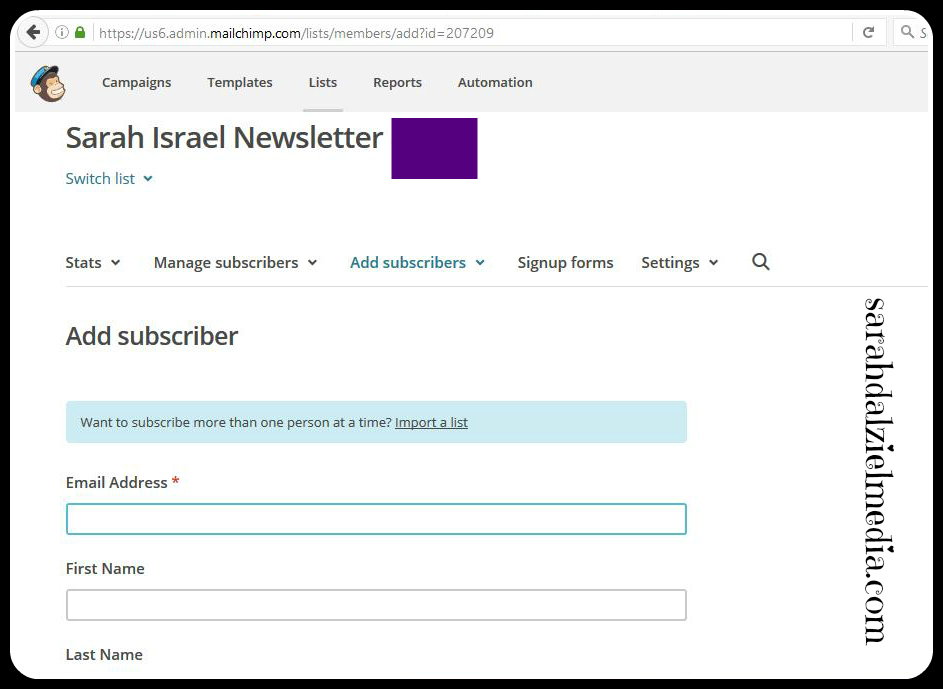
Add your first subscriber, use an email you have access to for testing purposes.
Creating Your First Missionary Newsletter:
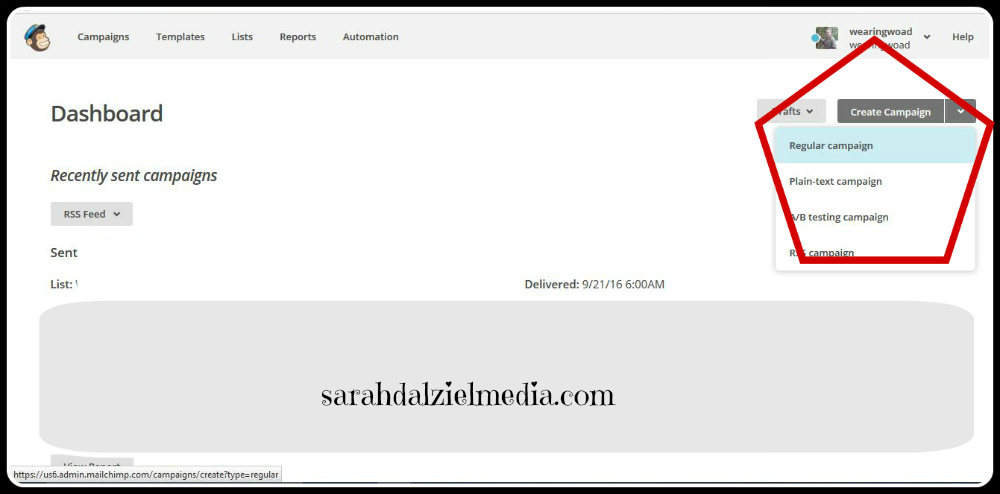
Create a new campaign, and select regular campaign.
Choose the list you want to send your email newsletter to.
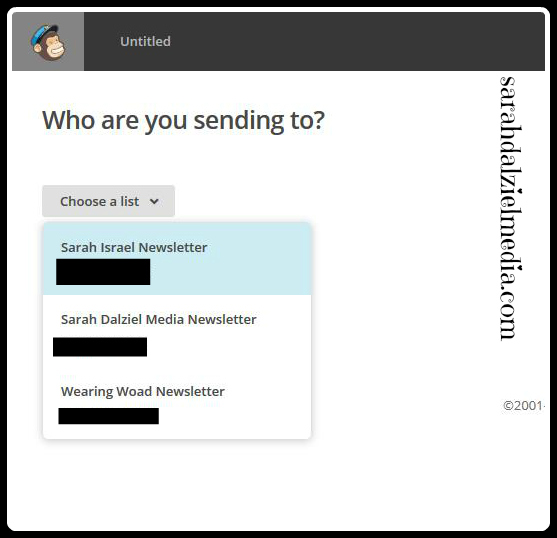
Then select the “entire list” option. If you have a lot of people already input into your list, you can select a segment rather than the entire list. At least for newsletter testing purposes.

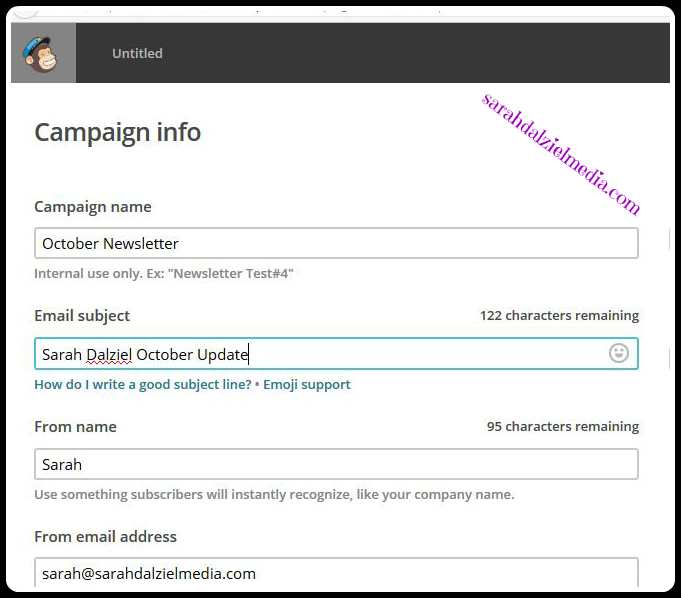
Fill out your campaign info. The “Campaign Name” is for your reference so you can reference back to your newsletter, or evaluate how your emails are doing over-time. The “Email Subject” is what your recipient sees, and should include your name when sending missionary newsletters.
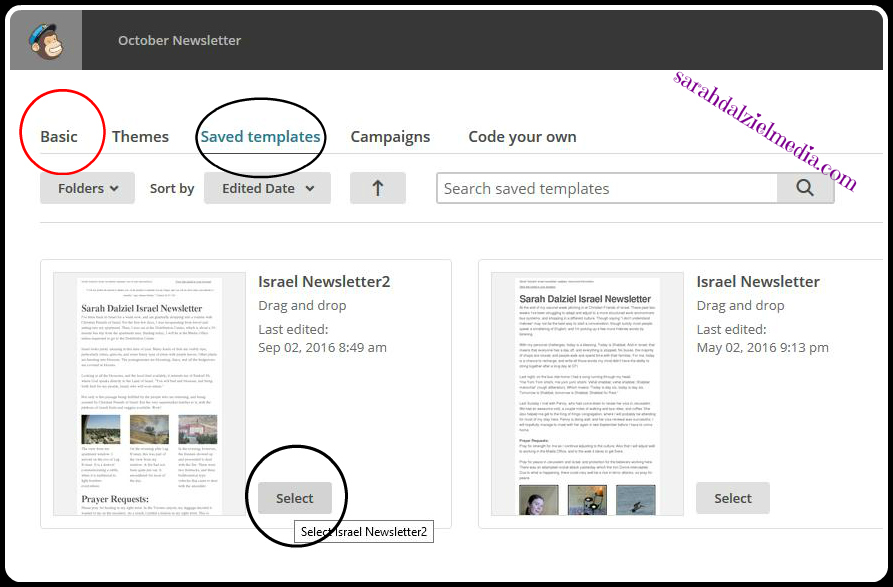
On the Newsletter Creation page, select “Basic” and chose a basic drag and drop template. Once you have your first newsletter created, you can “save as template” and then access it under “saved templates.”
When starting a new template, or a pre-saved template, you will have pre-filled in text. You can edit that field and delete the old text before inputting your new text.
Select your template or drag and drop the pieces you want to use.
I like having a heading photo, and a few small photos in the body of my newsletter. As well as two larger text sections. The bottom portion of my newsletter is a small advert for my fiction novel, The Prophet’s Shield.
Type out your newsletter.
Add your pictures, and captions.
And don’t forget to do a quick proofread.

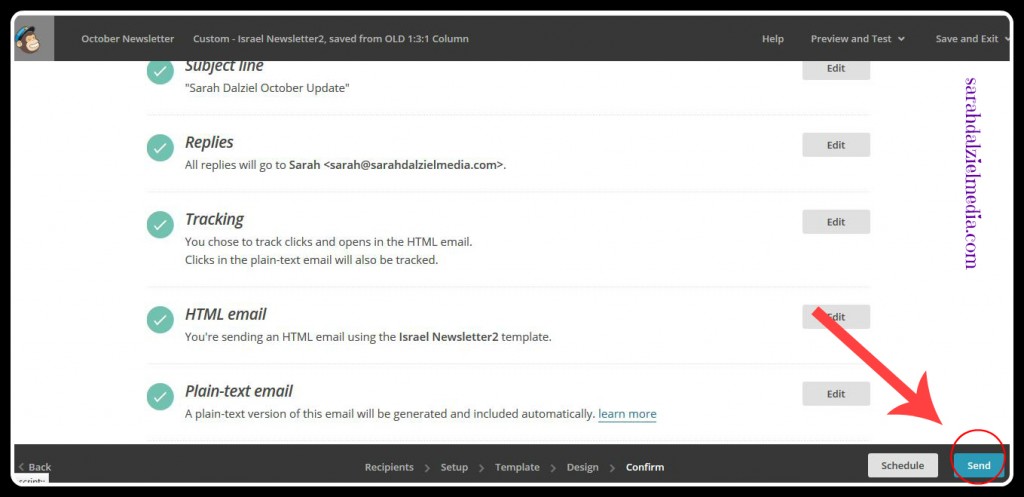
Once you are satisfied with the content of your newsletter, click on the “next” button at the bottom of the screen. When the next page loads hit “send” and then select “send now” on the pop-up.
Your test newsletter should appear in your in-box within 15 minutes. You can now add more subscribers and create newsletters as needed.
Using an email newsletter program is a great way to help you keep in touch with your church family, supporters, and friends while busy on the mission field.
Back To You:
What annoys you when you receive newsletters? Have you ever received a missionary newsletter that followed newsletter best practices? What else would you like to learn about sending newsletters and keeping in touch with your supporters?
Leave a comment, I love hearing from you!

Leave a Reply